



















Planning a bathroom renovation can feel overwhelming when you're staring at an outdated space and trying to figure out where to start. Whether you're dealing with leaky taps, tired tiles, or simply dreaming of a spa-like retreat, having a solid bathroom renovation checklist is your roadmap to success. The key is breaking down this major project into manageable steps that flow logically from one phase to the next.
A well-structured renovation checklist doesn't just keep you organised - it helps prevent costly mistakes, ensures you don't miss critical steps, and gives you realistic expectations about timelines and budgets. From initial planning and permits through to the final touches, each phase builds on the previous one to create your dream bathroom.
In this guide, we'll walk through the essential phases of bathroom renovation, highlight common pitfalls to avoid, and share practical insights from experienced renovators who've learned what works and what doesn't. You'll discover why timing certain tasks together can save you money, which hidden costs to plan for, and when it makes sense to bring in the professionals.
Why Do You Need A Comprehensive Renovation Checklist
A bathroom renovation involves multiple trades, precise timing, and significant financial investment. Without proper planning, you could find yourself dealing with rework, budget blowouts, or lengthy delays that turn your renovation dream into a nightmare.
What Are The Most Common Renovation Mistakes
Many homeowners underestimate the complexity of bathroom renovations and jump in without adequate preparation. The most frequent issues include:
-
Poor sequencing - Installing finishes before rough-in work is complete
-
Budget miscalculations - Forgetting to factor in permits, waste removal, and unexpected structural issues
-
Inadequate waterproofing - Rushing this critical step to save time or money
-
Electrical and plumbing conflicts - Not coordinating these trades properly
-
Unrealistic timelines - Expecting everything to go perfectly without buffer time
Industry data consistently shows that actual renovation costs typically exceed initial estimates by 20-30%. This happens because homeowners often focus on the obvious expenses like tiles and fixtures while overlooking peripheral costs such as rubbish removal, temporary facilities, and potential structural modifications.
How Does Proper Planning Save Money And Time
Experienced renovators emphasise that coordinating plumbing and electrical rough-in work simultaneously prevents unnecessary rework and reduces labour costs. When these trades work together during the same phase, they can plan around each other's requirements rather than trying to retrofit solutions later.
Breaking complex tasks like waterproofing and tiling into detailed sequential steps also helps with project management. Instead of treating "waterproof and tile" as one massive job, you can monitor progress through specific milestones such as surface preparation, membrane application, cure time, tile layout, grouting, and sealing.
What Should Your Pre-Renovation Planning Include
Before you start swinging a hammer or calling trades, invest time in thorough planning. This phase determines whether your renovation runs smoothly or becomes a source of ongoing stress.
How Do You Set A Realistic Budget
Start by researching typical costs for your area and the scope of work you're planning. Factor in a financial buffer for unexpected issues - while expert recommendations vary, most renovation professionals suggest a contingency fund of 10-20% based on the complexity of your project.
Your budget should account for:
-
Permits and approvals
-
Demolition and waste removal
-
Structural modifications
-
Plumbing and electrical work
-
Waterproofing materials and labour
-
Fixtures, fittings, and finishes
-
Professional fees
-
Temporary accommodation if needed
Many renovators are surprised by "hidden" costs like wall insulation upgrades, framing rectifications, or bringing electrical systems up to current code requirements. Building these possibilities into your budget from the start prevents nasty surprises.
What Permits And Approvals Do You Need
Check with your local council about permit requirements, especially if you're moving walls, changing window sizes, or significantly altering plumbing layouts. Some work requires certified tradespeople and formal approvals, while other modifications can proceed with appropriate notifications.
Research building codes and standards that apply to your renovation. Modern requirements for ventilation, waterproofing, and electrical safety may be more stringent than when your home was originally built.
How Do You Sequence Demolition And Structural Work
The demolition and structural phase sets the foundation for everything that follows. Getting this sequence right prevents damage to elements you want to keep and ensures a clean slate for the rebuild.
What Order Should Demolition Follow
Industry best practice involves starting with utilities shut-off, then removing fixtures and fittings first, followed by wall materials and tiles, and finally flooring elements. This approach minimises damage to surrounding areas and makes waste removal more manageable.
Protect adjacent rooms with plastic sheeting and seal ventilation systems to prevent dust spread. Plan for waste removal before you start - having a skip bin or removal service arranged prevents your home from becoming a construction site storage area.
When Should Structural Modifications Happen
Complete all structural work, including wall modifications, window changes, and framing rectifications, before any services or finishes. This is also the ideal time to upgrade insulation and address any issues with wall alignment or structural integrity.
If you're unsure about structural requirements or feel overwhelmed by the complexity, this is when many homeowners choose to engage professional builders. Their experience can prevent costly mistakes and ensure work meets current building standards.
[collection-carousel="trade"]
What Is The Best Approach For Plumbing And Electrical Rough-In
Why Should Plumbing And Electrical Be Coordinated
Experienced renovators strongly recommend scheduling plumbing and electrical rough-in work in close coordination. While the evidence on timing varies, proper coordination allows trades to plan around each other's requirements and prevents conflicts that could require expensive rework later.
When these trades work together, they can:
-
Plan optimal routes for pipes and cables
-
Avoid drilling through each other's work
-
Coordinate penetrations through structural elements
-
Ensure adequate access for maintenance
-
Complete wall framing modifications efficiently
What Should You Consider For Future Maintenance
Plan access points for future maintenance and upgrades. Install isolation valves for major fixtures and consider the accessibility of connections behind tiles or built-in elements. Your future self will thank you for this foresight when simple maintenance doesn't require major demolition.
Document the location of pipes and cables with photos before walls are closed up. This information proves invaluable if you need to locate services for future modifications or repairs.
How Should You Approach Waterproofing And Tiling
Waterproofing is arguably the most critical aspect of bathroom renovation. Get this wrong, and you'll face expensive repairs and potential structural damage. Take the time to do it properly.
What Are The Key Waterproofing Steps
Breaking waterproofing into detailed sequential tasks helps ensure nothing is missed and allows for proper quality control at each stage. The process should include:
-
Surface preparation - Clean, dry, and prime all surfaces
-
Pre-waterproofing inspection - Check for gaps, cracks, or irregular surfaces
-
Membrane application - Follow manufacturer's specifications for coverage and thickness
-
Cure time - Allow proper drying before proceeding
-
Testing - Conduct flood testing where appropriate
-
Final inspection - Verify complete coverage and integrity
Don't rush the cure times between coats or before tiling. The membrane needs to reach full strength to provide reliable long-term protection.
How Do You Plan The Tiling Sequence
Plan your tiling layout carefully, starting with a detailed measurement and marking process. Consider the visual impact of tile cuts and aim to place full tiles in the most prominent areas. Wall tiling typically starts from the second row up, with floor tiles installed first to provide a reference point.
Allow adequate time for grouting, cleaning, and sealing. These finishing steps significantly impact the final appearance and longevity of your installation.
What Fixtures And Fittings Should You Install When
The fixture installation phase is where your bathroom starts to take shape and feel like a real space again. Proper sequencing prevents damage and ensures everything fits together perfectly.
What Order Should Fixture Installation Follow
Install fixtures in order of dependency and accessibility. Generally, this means:
-
Bathtub or shower base - These large items need clear access
-
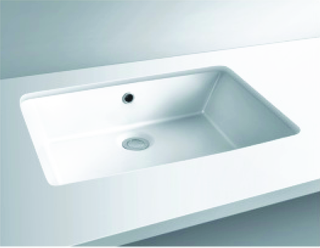
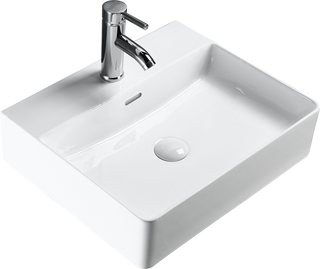
Toilet and basin - After plumbing connections are tested
-
Tapware and accessories - Once surfaces are complete
-
Mirrors and lighting - Final electrical connections
When selecting your bath options, consider both the installation requirements and ongoing maintenance needs. Some designs require specific framing or plumbing modifications that impact the renovation sequence.
How Do You Choose Quality Fixtures That Last
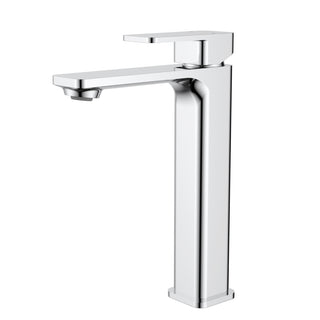
Invest in quality fixtures for items you'll use daily. Tapware selection should balance style with durability and ease of maintenance. Look for products with good warranty coverage and readily available spare parts.
[collection-carousel="tapware"]
|
Fixture Type |
Key Considerations |
Installation Timing |
Quality Indicators |
|---|---|---|---|
|
Bathtub |
Size, access, drainage |
Before wall finishing |
Material thickness, warranty |
|
Toilet |
Rough-in dimensions, efficiency |
After flooring complete |
Water efficiency, comfort height |
|
Basin |
Counter integration, storage |
With benchtop installation |
Material durability, mounting |
|
Tapware |
Pressure requirements, style |
After surface completion |
Cartridge quality, finish |
What Final Touches Complete Your Renovation
The finishing phase transforms your functional bathroom into an inviting space. These details make the difference between a basic renovation and a space you'll love using every day.
How Do Mirrors And Lighting Impact The Space
Mirrors and lighting work together to create the ambiance and functionality of your bathroom. Consider both task lighting for grooming activities and ambient lighting for relaxation. Quality mirrors can make a small space feel larger and brighter while providing essential functionality.
LED mirrors combine both functions and often include useful features like demisting and touch controls. The Modena Round LED Mirror represents the type of modern fixture that adds both style and practical functionality to contemporary bathrooms.
[collection-carousel="mirrors"]
What Accessories And Storage Options Work Best
Choose accessories that complement your overall design while providing genuine functionality. Built-in storage often works better than surface-mounted options in terms of both appearance and water protection.
Consider the daily reality of bathroom use when selecting accessories. Items that look great in showrooms might not withstand the humidity and regular cleaning that bathrooms require.
How Do You Know When To Call The Professionals
While many aspects of bathroom renovation can be DIY projects, some tasks require professional expertise for safety, compliance, or quality reasons.
What Work Requires Licensed Tradespeople
Plumbing and electrical work typically require licensed professionals, especially for new installations or major modifications. Waterproofing in wet areas may also need certified applicators depending on your location and the type of construction.
If project management feels overwhelming or you're unsure about sequencing complex tasks, professional builders bring valuable experience in coordinating trades and managing timelines. Their expertise can prevent mistakes that would cost more to fix than their fees.
What Questions Should You Ask Potential Contractors
When interviewing professionals, ask about:
-
Licensing and insurance coverage
-
Experience with similar projects
-
References from recent clients
-
Approach to project management and communication
-
How they handle unexpected issues or variations
-
Warranty or guarantee terms
A good contractor will provide detailed quotes that break down labour and materials, explain the work sequence, and set realistic timelines with appropriate buffer time.
[collection-carousel="accessories"]
What Should You Expect During The Renovation Process
Understanding realistic timelines and potential challenges helps you prepare mentally and practically for the renovation journey.
How Long Do Bathroom Renovations Typically Take
A complete bathroom renovation timeline varies considerably based on scope and complexity. While industry sources suggest anywhere from 2-6 weeks for the construction phase, with simpler projects at the shorter end and comprehensive renovations requiring more time, especially when structural changes or complex installations are involved.
Build buffer time into your schedule for weather delays, material shortages, or the inevitable unexpected complications that arise in renovation projects. Having alternative bathroom facilities arranged for longer than you think you'll need reduces stress when timelines extend.
What Should You Prepare For During Construction
Renovation creates dust, noise, and disruption to your daily routine. Protect furniture and belongings in adjacent areas, and plan alternative arrangements for morning routines and daily hygiene needs.
Communicate regularly with your trades about progress, any concerns, and upcoming milestones. Good communication prevents misunderstandings and helps keep projects on track.
What the Research Says About Bathroom Renovations
Evidence from renovation professionals and building standards provides valuable insights for your project planning:
-
Systematic waterproofing approaches significantly reduce long-term failure rates and moisture damage
-
Proper documentation of hidden infrastructure saves substantial costs during future maintenance and modifications
-
Licensed professionals are essential for plumbing and electrical work to ensure compliance and safety
-
Project timelines and costs frequently exceed initial estimates, making contingency planning crucial
-
The evidence on simultaneous versus sequential rough-in work is mixed, though coordination between trades remains important
-
Structural work must precede all services and finishes to prevent costly rework
What To Do Next For Your Bathroom Renovation
Armed with this comprehensive checklist, you're ready to start planning your bathroom renovation with confidence. Begin by assessing your current space, defining your goals, and setting a realistic budget that includes contingency funds for unexpected discoveries.
Research local tradespoeple and gather quotes from multiple contractors if you're planning to use professionals. Don't rush this selection process - the right team can make the difference between a stressful ordeal and an exciting transformation.
Start collecting product ideas and creating mood boards to help communicate your vision to trades and suppliers. Browse quality fixtures and fittings to understand pricing and lead times, as some specialty items may require extended ordering periods.
[collection-carousel="showers-1"]
Remember that renovation is a journey, not a sprint. Take time to plan thoroughly, build relationships with reliable trades, and maintain realistic expectations about timelines and costs. The extra effort invested in preparation pays dividends in reduced stress and better outcomes.
Key Takeaways For Renovation Success
Your bathroom renovation checklist should prioritise proper sequencing, realistic budgeting, and quality workmanship over speed. The most successful projects are those that invest time in planning and preparation rather than rushing into demolition.
Coordinate trades effectively, especially during the rough-in phase, and never compromise on waterproofing quality. These decisions impact the long-term success and enjoyment of your renovated space.
Finally, don't hesitate to seek professional help when projects feel overwhelming or when technical expertise is required. The goal is creating a bathroom you'll love for years to come, not just completing a renovation project. With careful planning and realistic expectations, your bathroom renovation can transform not just your space, but your daily experience at home.