





Baths are heavier than people think, harder to access once built in, and sit right on the junction between two trades. That combination is why bath installs generate more callbacks than almost anything else in a bathroom.
Here is the practical version, aimed at whoever is actually doing the work or managing the job.
[collection-carousel="baths"]
Start with the load
The number that governs everything else, and the one most often skipped.
A 1500mm bath holds somewhere around 150 to 230 litres depending on the shape. Water is a kilogram a litre, so call it 200kg of water, plus the bath itself, plus a person. You are designing for something in the region of 300kg concentrated on a small footprint.
On a slab that is irrelevant. On a suspended timber floor it very much is not, particularly in an older house where the joists were never sized for a freestanding bath sitting on four points rather than spread along a frame.
What that means in practice
Check the joist direction, span and condition before you commit to a position. A bath running parallel to the joists concentrates load across fewer members than one running across them. If you are unsure, that is an engineer's question, and the fee is trivial next to a floor that flexes.
[collection-carousel="toilets"]
Deflection is the real enemy. A floor that moves under load will crack grout, break a silicone seal and eventually fail a waterproofing membrane. Fixing that means pulling the bath out, which is the expensive scenario this paragraph exists to prevent.
Access to the waste
The second thing that separates a professional install from a regrettable one.
Every bath has a waste and an overflow connection, and both will eventually need attention. If you build the bath in with no way to reach them, the only future repair path is through tiles.
So plan access from the outset. An inspection panel in the bath surround, a removable section of skirting, or access from an adjoining cupboard or hallway wall. For a freestanding bath, make sure the floor waste connection can be reached without lifting the bath, because lifting a stone-composite bath is a two-person job at best.
Our bath bend pop-down waste with connector is the straightforward option for most installs, and the universal pop-up waste suits where you want the cleaner look.
[collection-carousel="wastes"]
Bath types and what each one demands
|
Type |
Support needed |
The catch |
|---|---|---|
|
Inset or drop-in |
Framed hob, bedded on the frame |
Waterproofing the bath to hob junction is critical |
|
Back-to-wall |
Floor plus wall fixing |
Needs the wall built square to the bath |
|
Freestanding, acrylic |
Integral feet or base |
Lighter, but can flex if not bedded properly |
|
Freestanding, stone composite |
Solid, level bearing across the base |
Very heavy empty, needs floor checked first |
|
Corner |
Two walls plus floor |
Unforgiving if the corner is not square |
|
Shower over bath |
As above, plus wall protection |
Expands the waterproofing zone significantly |
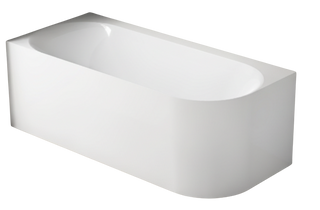
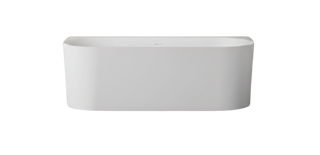
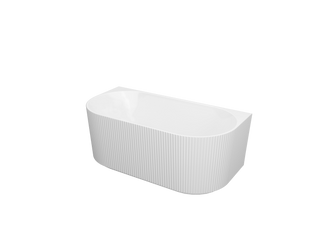
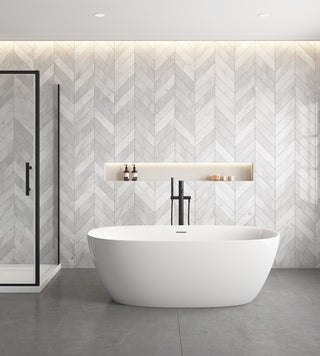
Our Siena freestanding bath covers the standard case, and the corner version is a sensible answer in a tight footprint where a centred bath would eat the floor space.
[collection-carousel="mixers-1"]
The waterproofing trap with showers over baths
This is the single most commonly missed requirement, and it is expensive to retrofit.
Read that against a typical design where a freestanding bath sits near an open shower. The waterproofing scope is not the bath footprint. It is a 1.5 metre circle measured from the rose, and it very probably takes in floor and wall that nobody budgeted to waterproof.
The compliance structure behind it
[collection-carousel="outlets"]
So the bath-to-wall junction is a detail the code singles out, which tells you how often it fails. Treat it as a designed junction with a bond breaker and a flexible sealant, not as something to fill with grout and hope.
Who should be doing the waterproofing
Worth being direct about, because it varies by state and it is not a general trades skill.
In Queensland, waterproofing is a licensed trade category in its own right under the QBCC. Other states handle it differently, but the underlying point holds everywhere. Membrane application is a specialist job with a real failure mode.
The plumbing side is licensed everywhere. Bath waste and overflow connections fall under AS/NZS 3500.2 for sanitary plumbing and drainage, and you should expect compliance documentation at handover. In New South Wales that means a certificate of compliance for notifiable work, with equivalents in other jurisdictions.
And check the products. WaterMark certification confirms a plumbing product has been assessed as fit for purpose and authorised for use in a plumbing installation, which matters for wastes and traps regardless of how the bath itself is sold.
[collection-carousel="trade"]
Sequence that avoids rework
Order of trades is where bath jobs are won or lost.
-
Confirm the floor can take it. Before anything is ordered, not after it arrives.
-
Have the bath on site before framing the hob. Catalogue dimensions and actual mouldings differ.
-
Dry-fit and mark the waste position. Then rough in to the real bath, not the drawing.
-
Build in the access panel now. It is almost impossible to add later.
-
Set the bath height against the finished floor. Include tile and bed thickness in the calculation.
-
Waterproof, with bond breakers at the junctions. Let it cure before anyone tiles.
-
Tile to the bath, then seal the junction flexibly. Silicone, not grout, at the movement joint.
-
Fill the bath before final sealing. A full bath sits lower than an empty one.
That last step is the professional detail. An acrylic bath deflects under load, so a seal formed against an empty bath will be stretched the first time somebody fills it. Fill it, let it settle, then seal and leave it full until the silicone cures.
[collection-carousel="accessories"]
Questions worth settling in writing
If you are the one engaging the trades rather than doing the work, these are the ones that prevent arguments.
Who is responsible for the waterproofing and what certification will you receive. Exactly where the access panel will be and what it will look like. Who supplies the waste and whether it suits the bath. What happens if the floor needs strengthening once it is opened up. And the placement of tapware, because wall-mounted bath spouts have to be roughed in before lining and cannot be moved afterwards.
Get the tapware positions marked on a drawing and signed off. It is the cheapest insurance on the whole job.
[collection-carousel="showers-1"]
The short version
-
A filled bath with a person in it can approach 300kg on a small footprint.
-
Check joist direction, span and condition before fixing a position on a timber floor.
-
Deflection cracks grout, breaks seals and eventually fails membranes.
-
Build in access to the waste and overflow from the start.
-
A shower over a bath without a screen counts as an unenclosed shower.
-
That means a 1500mm radius waterproofing zone measured from the rose.
-
Walls inside that radius without a screen need waterproofing to 1800mm.
-
The Housing Provisions point to AS 3740 specifically for bath and wall intersections.
-
Where AS 3740 is used it must be the 2021 edition referenced in NCC 2022.
-
Waterproofing is a licensed trade in its own right in Queensland.
-
Bath waste connections are licensed plumbing work under AS/NZS 3500.2.
-
Use WaterMark certified wastes and traps.
-
Have the physical bath on site before framing anything.
-
Set bath height against finished floor level, including tile and bed.
-
Fill the bath before final sealing, and keep it full while the silicone cures.
Baths reward preparation and punish improvisation, and almost every callback traces back to a decision made before the bath arrived. If you want to check a bath against a floor plan or an existing rough-in, book a showroom appointment and bring the drawings.