






Toilets are the most complained-about fixture in a finished bathroom, and almost never because the toilet is faulty. It is nearly always the set-out, the gap at the wall, or a connection that was fudged because the drainage was 15mm off.
Here is how a proper install runs, and where the real decisions get made.
[collection-carousel="toilets"]
The gap at the wall, explained
Worth starting with the thing people actually ring up about. The pan is in, and there is a 10mm gap between it and the wall. Is that a bad job?
Usually not. In an older house, the overwhelmingly likely explanation is that the wall is out of plumb or the floor is out of level, and often both. A pan is a rigid moulded object. A century-old wall is not, and the pan cannot follow it.
The second explanation is the drainage. If the waste pipe coming through the floor sits slightly forward of where it should, the plumber has two options. Force the pan back and leave the connection strained, or accept the gap. A strained connection is how you get a slow leak inside the floor, which is a vastly worse outcome than a visible gap.
What good practice looks like
A tidy installer closes the gap with a neat bead of sanitary silicone, colour-matched, in one pass. Done well, it reads as a deliberate shadow line. Done badly, 10mm of caulk looks exactly as bad as it sounds, so this is worth asking about rather than assuming.
[collection-carousel="showers-1"]
On a close-coupled suite there is sometimes a little adjustment available between pan and cistern, so the two can be shuffled to even up the gaps front and back. Ask whether that has been tried before accepting the result.
Set-out is the whole job
Everything that goes wrong later was decided before the pan came out of the box.
AS/NZS 3500.2 is the standard covering sanitary plumbing and drainage, and it governs how the pan connects to the drain. The AS/NZS 3500 series sets the requirements for plumbing and drainage across water services, sanitary plumbing, stormwater and heated water.
The practical point is that the drain position has very little tolerance once the floor is finished. So the measurement that matters is the distance from the finished wall face to the centre of the waste, and it has to be taken against the finished surfaces, not the bare studs or the slab.
[collection-carousel="trade"]
The mistake that costs the most
Measuring before tiling. Add a 10mm tile and a 5mm bed to a wall and the pan no longer fits the way it did on paper. The set-out must be calculated with the tile thickness included, which means the toilet needs to be chosen before the tiler starts.
This is the single strongest argument for buying your fixtures early rather than at the end. A pan connector can absorb a small discrepancy. It cannot absorb a decision made three weeks too late.
Choosing the suite before the rough-in
Different suite types place the waste in different places, so this is a structural decision rather than a styling one.
|
Type |
Waste position |
Worth knowing |
|---|---|---|
|
Close-coupled, S-trap |
Floor, fixed distance from wall |
Least forgiving, set-out must be right |
|
Close-coupled, P-trap |
Wall, horizontal outlet |
More adjustment available |
|
Back-to-wall |
Floor or wall, concealed |
Hides the pipework, needs the wall built to suit |
|
Wall-hung |
In-wall, on a frame |
Easiest floor to clean, most planning required |
|
Overheight |
Same as standard |
Noticeably easier for tall or less mobile users |
|
Care or accessible |
Same as standard |
Grab rail compatibility and clearances matter |
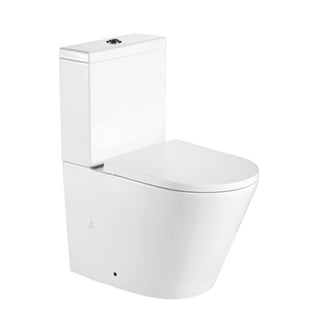
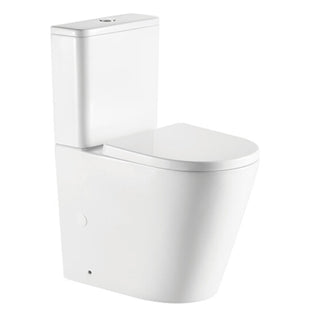
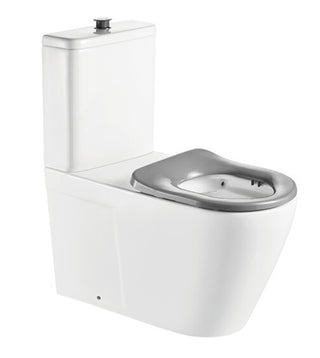
Our Siena rimless back-to-wall suite is the workhorse for most renovations, and there is an overheight version that is worth considering more often than people do. If the bathroom needs to work for someone with limited mobility, the care suite is built for it.
[collection-carousel="accessories"]
Water efficiency is not optional
This catches out people importing fixtures or buying from marketplace sellers.
Under the WELS scheme, more stars means greater water efficiency, and the label also shows water consumption so products can be compared directly. Toilets, taps, showers, urinals, dishwashers and washing machines are all covered.
Registration and labelling is a legal requirement for supply in Australia, not a marketing badge. An unregistered pan is a problem for the supplier and a headache for you, so buy from someone who can show you the rating.
[collection-carousel="towel-rail"]
The other certification to look for is separate. WaterMark certification means a plumbing product has been assessed as fit for purpose and authorised for use in a plumbing installation. WELS is about how much water it uses. WaterMark is about whether it is allowed to be connected at all. You want both.
The install, in order
Assuming the rough-in is correct and the floor and walls are finished.
-
Dry-fit first, before anything is fixed. Check the gap at the wall and the cistern line while you can still move things.
-
Check the floor for level under the pan. Pack it if needed rather than letting it rock.
-
Cut the pan connector to suit, not to the catalogue. This is where a careful plumber earns their rate.
-
Make the drainage connection properly sealed. No compromise here, ever.
-
Fix the pan to the floor as the manufacturer specifies. Not just silicone, if the instructions call for fixings.
-
Connect the water supply with an isolating stop. Future you will be grateful.
-
Fit the cistern and even up the gaps. Shuffle both components rather than only one.
-
Silicone the base neatly, leaving a weep gap at the front. A fully sealed base hides a leak until the floor is ruined.
-
Test the flush and check for movement. Then check again the next day.
That weep gap deserves a note. Sealing a pan completely around its base looks tidier, but if the connection ever weeps, the water has nowhere to show itself and goes into the floor instead. Leaving a small unsealed section at the front means a problem announces itself on the tiles where you can see it.
[collection-carousel="wastes"]
Isolation, and why it matters later
A small detail that separates a considered install from a rushed one.
Every toilet should have its own isolating stop on the supply, positioned where you can actually reach it. A cistern valve will eventually fail, and when it does you want to shut off that one fixture rather than the whole house.
The same logic applies elsewhere. Our quarter-turn washing machine stop is the laundry equivalent, and quarter-turn valves are easier to operate years later than the old screw-down type, which tend to seize.
[collection-carousel="mixers-1"]
Paperwork you should end up with
This is the part that protects you, and the part most people never ask for.
Sanitary plumbing is licensed work in every state and territory. You should receive documentation when it is finished. In New South Wales, plumbers must provide a certificate of compliance and a sewer service diagram for notifiable work.
The arrangements differ by state but the principle does not. In South Australia, a certificate of compliance must be provided for plumbing work, so if you are renovating locally this is the document to keep.
Keep it with the receipts for the fixtures. If a pan ever has to be warranty-claimed, or you sell the house, that folder is what settles the conversation.
[collection-carousel="basins"]
The short version
-
A 10mm gap at the wall is usually an out-of-plumb wall or an out-of-level floor.
-
Forcing a pan back to close a gap can strain the drainage connection, which is far worse.
-
A neat silicone bead is the accepted fix, done in one clean pass.
-
Try shuffling pan and cistern together before accepting uneven gaps.
-
Set-out must be measured from finished wall and floor surfaces, including tile thickness.
-
Choose the toilet before tiling, not after.
-
AS/NZS 3500.2 governs sanitary plumbing and drainage.
-
S-trap is the least forgiving set-out, P-trap gives more adjustment.
-
Wall-hung needs the most planning and gives the easiest floor to clean.
-
WELS registration and labelling is a legal requirement for supply.
-
WaterMark certification is separate and covers whether a product may be connected.
-
Dry-fit everything before fixing anything.
-
Fit an isolating stop you can actually reach.
-
Leave a weep gap at the front of the base so a leak shows itself.
-
Get the certificate of compliance and keep it.
The pattern across all of it is that toilets go wrong at the planning stage and get blamed at the installation stage. Decide the suite early, measure off finished surfaces, and use a licensed plumber who will hand you paperwork. If you want help matching a suite to an existing rough-in, book a showroom appointment and bring the measurements.